初始化工程
这里,我尝试用简单的方式来说明一个工程的构建。然后,再将简单的方式工程化(复杂化),最后拼凑成目前weex开源的代码结构。
安装weex-toolkit
这里要说明的是,目前最新版本的weex-toolkit0.5.2有bug,babel组件丢失的问题,解决办法可以添加babel组件依赖,也可以降级weex-toolkit
下面是此问题的issue
WeexBabelError issue
weex-toolkit是一个很好的工具供我们工程构建。首先,第一步是安装该工具:
$npm install -g weex-toolkit
测试weex-toolkit是否安装成功,可以使用如下命令测试:
$ weex --version
info 0.4.4
weex-toolkit常用命令
- –qr :显示二维码
- -o :把weex文件渲染成js
- weex $filename :在浏览器查看we的效果
1 | ^Cbogon:WeexProj Tec_yifei$ weex |
创建项目
这里,我们不再使用weex 跑一个文件的形式。我们需要一个较为完整的方案,因此,这里采用weex init命令创建项目。
首先,我们创建一个目录存放我们的项目,启动命令行:
$ mkdir test
$ cd test
$ weex init
    //下面一路回车
    prompt: Project Name:  (test)
    file: .gitignore created.
    file: README.md created.
    file: index.html created.
    file: package.json created.
    file: src/main.we created.
    file: webpack.config.js created.
跑起项目
首先,我们需要安装依赖。以后大家看到package.json文件,就可以直接npm install 安装模块了。
$ npm install
依赖安装完成,启动项目编译。
$ npm run dev
启动本地服务器。
$ npm run serve
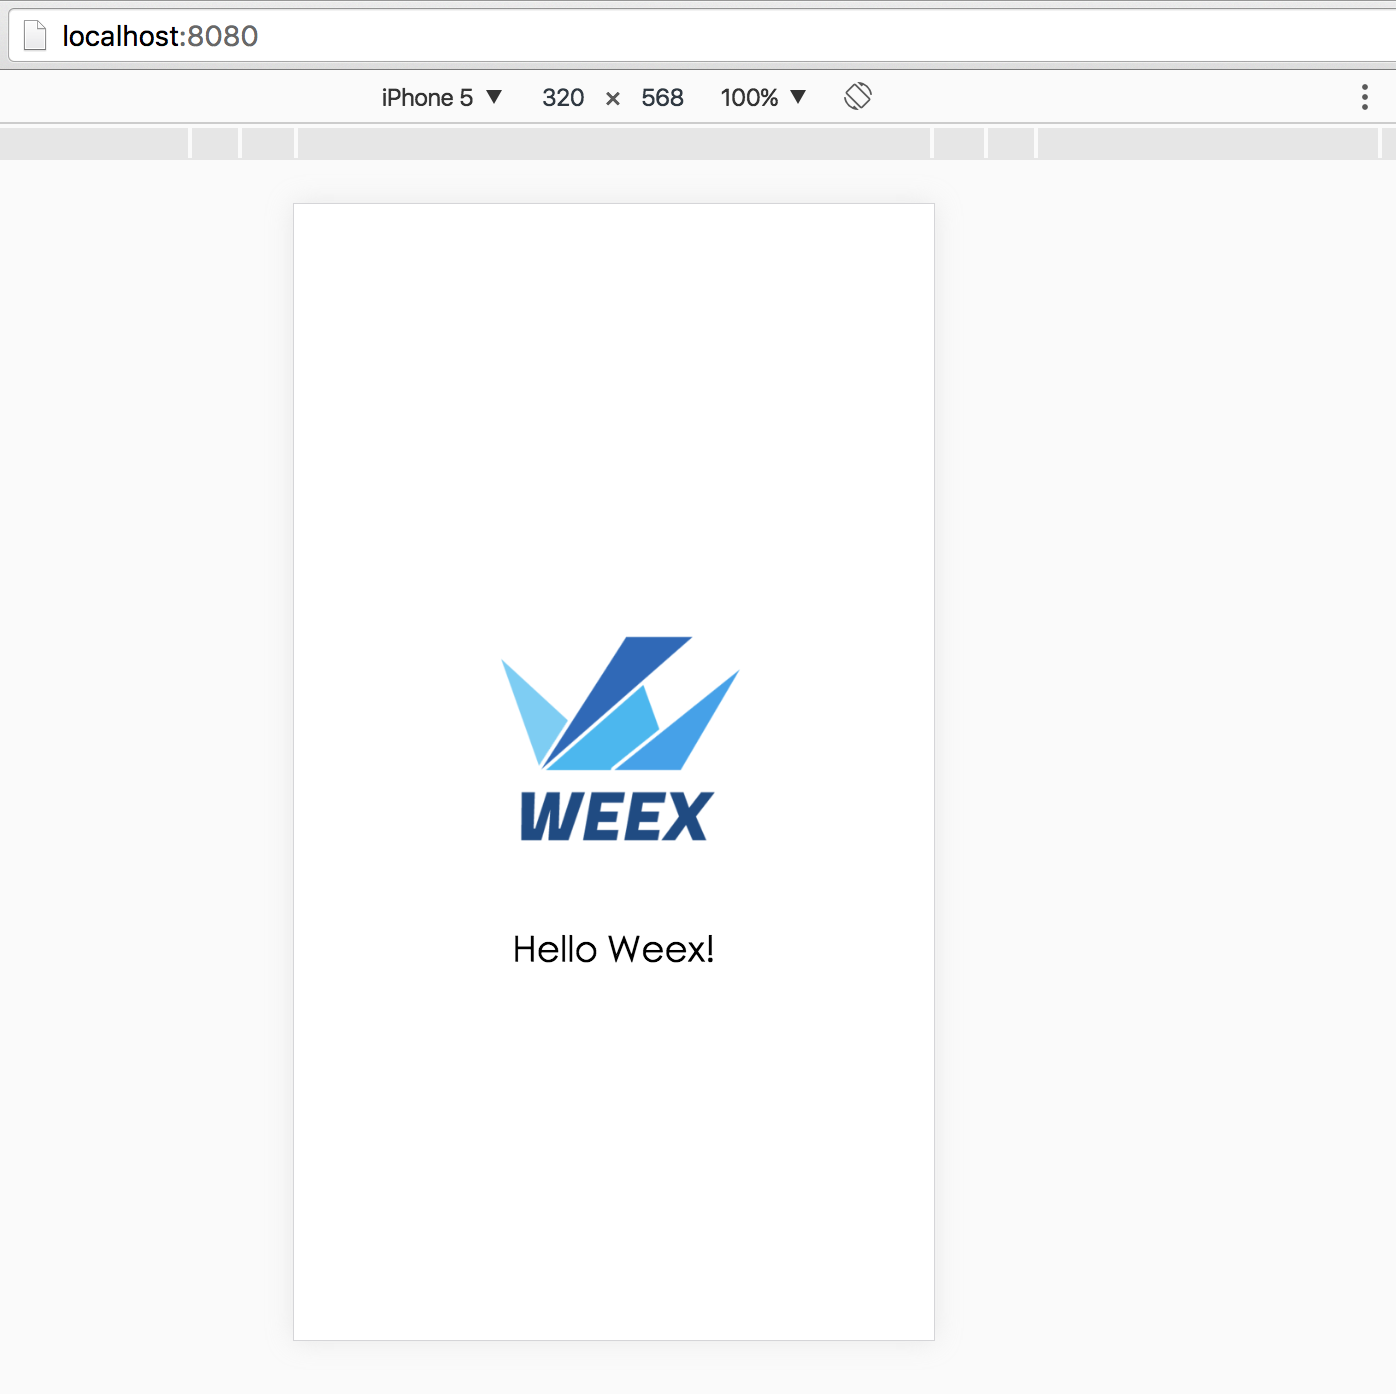
这时,打开浏览器,输入http://127.0.0.1:8080, 就会看到如下界面效果:
npm run dev干了什么事儿
这一些都是node/npm的常识了(所以对于萌新来说这都是坑)。首先,我们打开package.json文件。可以看到如下代码:
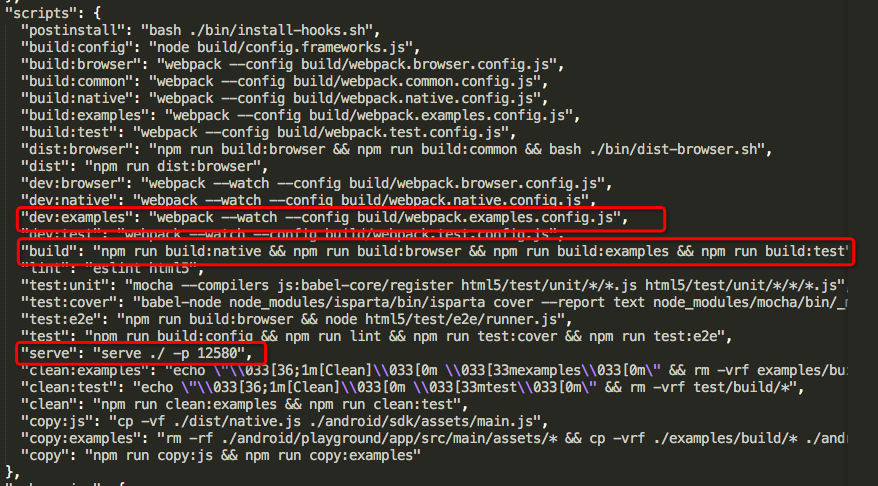
我们可以看到scripts里面包含了build、dev、serve、test四个属性。例如dev属性,npm run dev实际上相当于 webpack –watch。即等同开发者做了这件事:
$ webpack --watch
ok,看到这里明白了。npm run dev调用了webpack。那么,webpack实际上是执行了配置文件。
webpack默认是webpack.config.js作为配置文件的。所以看一下webpack.config.js中的内容。
关于webpack的学习资料
webpack入门指迷
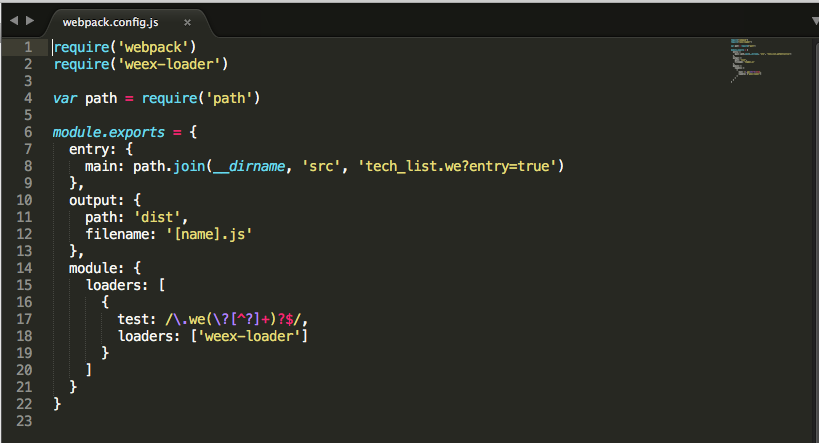
这个文件比较好理解。一个是引入了webpack的配置,一个是使用了weex-loader模块。
entry属性是表示入口文件,output表示输出文件,默认输出到dist文件夹。所有打开dist就可以看到一个打包完成的main.js文件。
npm run serve
这个同上,主要是做一个服务器,提供浏览器访问静态资源。
入口文件index.html
是时候,去了解我们index.html文件干了一件啥事。其实,index.html就是页面的入口文件。具体大码如下:
1 |
|
作为入口和载体,html做了两件事:
1) 拿到页面的URL,根据page参数获得需要加载的js文件路径
2)初始化weex实例,加载文件。
此处文章可参考:http://alibaba.github.io/weex/doc/advanced/integrate-to-html5.html
更好的理解weex github源码结构
到这里,整个weex项目的来龙去脉,应该是比较清楚了。那么,回过头来看,weex开源代码如何构建,应该是件水到渠成的事了。比如看这段打包的配置代码:https://github.com/alibaba/weex/blob/dev/build/webpack.examples.config.js
var path = require('path');
var fs = require('fs');

var entry = {};

function walk(dir) {
  dir = dir || '.'
  var directory = path.join(__dirname, '../examples', dir);
  fs.readdirSync(directory)
    .forEach(function(file) {
      var fullpath = path.join(directory, file);
      var stat = fs.statSync(fullpath);
      var extname = path.extname(fullpath);
      if (stat.isFile() && extname === '.we') {
        var name = path.join('examples', 'build', dir, path.basename(file, extname));
        entry[name] = fullpath + '?entry=true';
      } else if (stat.isDirectory() && file !== 'build' && file !== 'include') {
        var subdir = path.join(dir, file);
        walk(subdir);
      }
    });
}

walk();

module.exports = {
  entry: entry,
  output : {
    path: '.',
    filename: '[name].js'
  },
  module: {
    loaders: [
      {
        test: /\.we(\?[^?]+)?$/,
        loader: 'weex'
      },
      {
        test: /\.js(\?[^?]+)?$/,
        loader: 'weex?type=script'
      },
      {
        test: /\.css(\?[^?]+)?$/,
        loader: 'weex?type=style'
      },
      {
        test: /\.html(\?[^?]+)?$/,
        loader: 'weex?type=tpl'
      }
    ]
  }
}
就是编译examples目录下所有.we文件到build目录。代码可以细看,都是Node.js File System相关的API.